
Using wait lists
A wait list keeps track of parties waiting for a table, and texts them from the POS when their table is ready. Customers can also add themselves to the list from their own phone. This guide covers running the list at the POS and switching it on in BREW POS Admin.
Open the wait list
1. Tap Tools, top right (Figure 1).
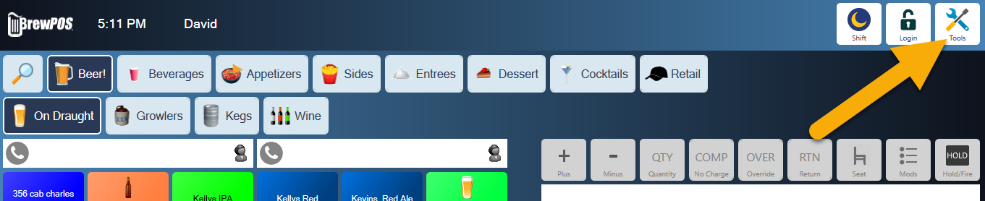
Figure 1. Tools, top right of the order screen
2. Tap Wait List. If it is not there, the wait list is switched off for this station: it is the Wait List setting under Tools, Settings, Configure, Workstation, and it needs manager or Settings permission to change.
The screen has two lists (Figure 2). It refreshes itself once a minute.
• Waiting is everyone still waiting for a table.
• Notified is everyone who has been told their table is ready.
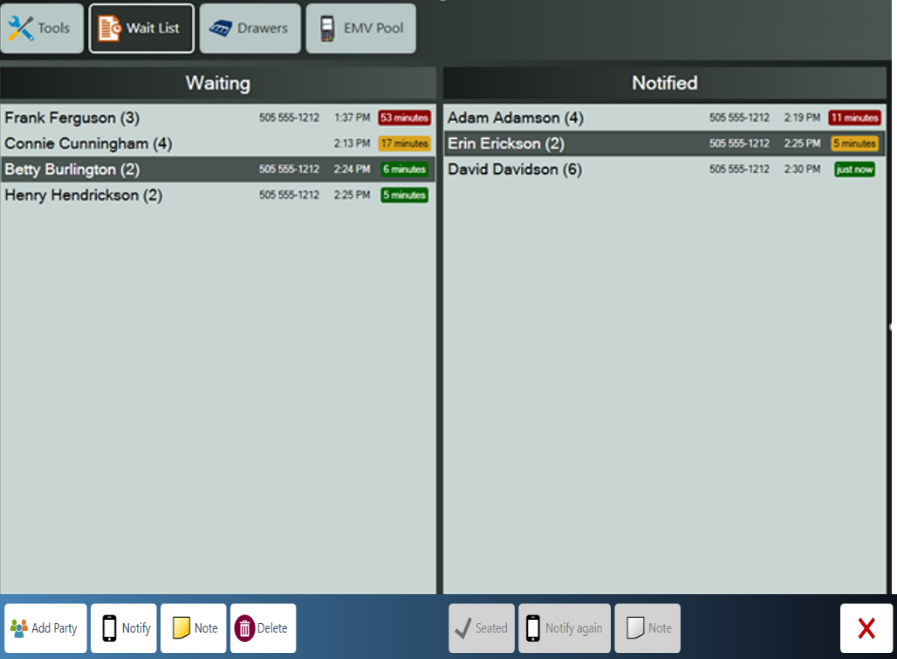
Figure 2. Waiting on the left, Notified on the right. The colored tag shows how long each party has waited
Add a party
1. Tap Add Party.
2. Type the party's name and how many are in it (Figure 3).
3. Optional: type a phone number and a note. Without a phone number, the system assumes you will tell the party in person.
4. Tap the green check mark.
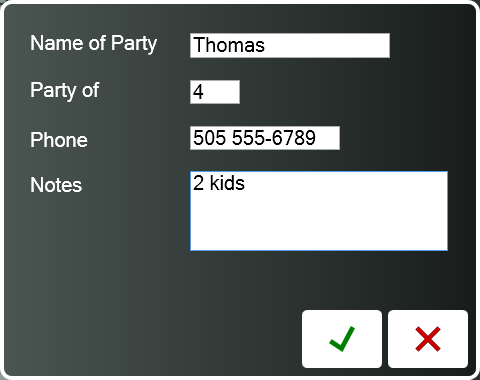
Figure 3. A party of four, with a phone number to text
Tell a party their table is ready
Select the party on the Waiting list, then use the buttons along the bottom:
• Notify texts the customer that their table is ready and moves them to Notified.
• Note adds a note to the party.
• Delete takes the party off the Waiting list.
On the Notified list:
• Seated takes the party off the list once they are at their table.
• Notify again sends a second text.
Switch wait lists on
Wait lists are set for each location in BREW POS Admin, under Setup, Settings, Locations (Figure 4).
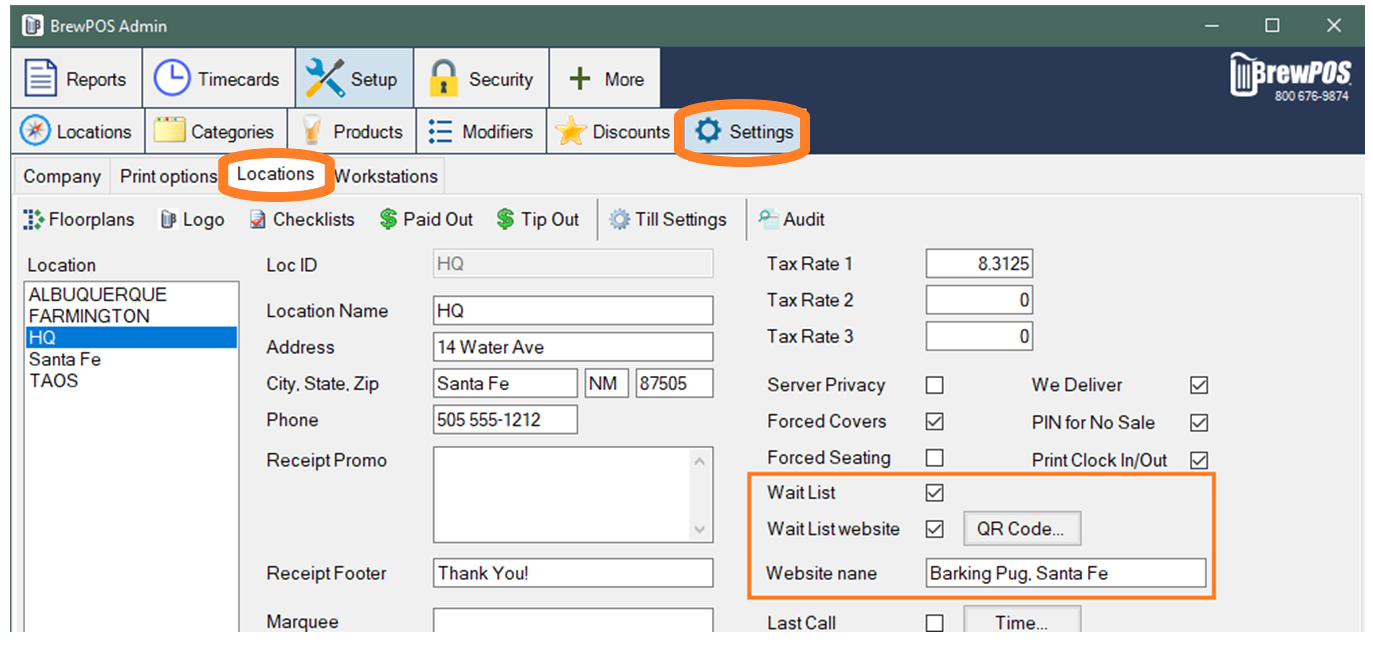
Figure 4. The wait list settings on a location
• Wait List switches the wait list on or off at this location.
• Wait List website switches on a sign-up page so customers can add themselves from their phones.
• Website name is the name customers see on that page and in their text messages (Figure 5).
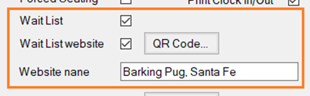
Figure 5. The three wait list settings
Let customers sign themselves up
With Wait List website ticked, click QR Code beside it. The code opens the location's sign-up page (Figure 6). Click Copy to copy it so you can print it and put it up at the door.
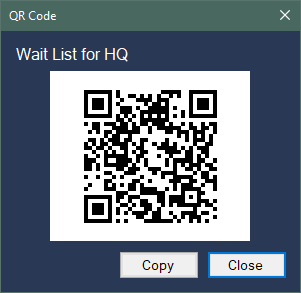
Figure 6. The QR code for the location's wait list
Customers who scan it fill in their name, party size and phone number, and join the list (Figure 7).
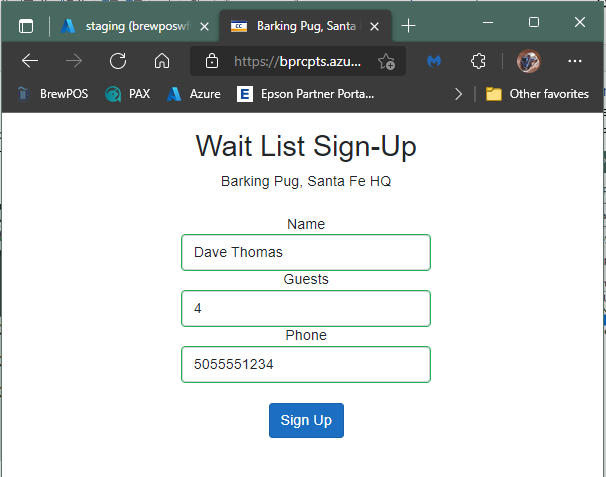
Figure 7. The sign-up page a customer sees
About this guide
BREW POS: front of house how-to guide
Applies to: the BREW POS terminal and BREW POS Admin, build installed 23 September 2026. The per-station Wait List setting was checked on a running terminal on 30 September 2026, where it was switched off. Running the list and the Admin settings come from the BrewPOS quick reference Wait Lists (April 2022) and were not re-checked.
Last reviewed: 30 September 2026 · Owner: Eddy
BrewPOS How to use
Support 1-800-676-9874
Email [email protected]
© 2026 BREW POS. All rights reserved.