
Comps, voids and discounts at the POS
There are several ways to take an item off a ticket or change its price at the POS, and each one lands in a different place in your reports. Picking the right one keeps your sales, stock and profit figures honest. This guide explains each button, when to use it, and where it shows up afterwards.
Setting up the discounts themselves in BREW POS Admin is covered in Setting up discounts.
Which one to use
Not sent to the kitchen or bar yet: Minus.
Made, but the guest should not pay for it: Comp.
Made, and the guest pays less: Override or discount.
The ticket was never wanted and nothing was made: Cancel.
The ticket is already paid: Void.
Paid on an earlier day, or the guest wants money back for one item: Refund (see Processing a refund).
Made, then spilled, dropped or sent back: Waste, from the item's Mods screen (see Fixing an item you rang in wrong).
If the presenter ticket has already gone to the table, print it again after a comp, an override or a discount, so the guest sees the right total. See Printing the presenter ticket.
Watch out: do not minus or cancel something that was made
Minus after send and Cancel take the item out of the system altogether. If you track stock or profit, those numbers go wrong. For anything the bar or kitchen has already made, use Comp instead.
Minus: take an item off before it is sent
1. Select the item on the ticket.
2. Tap Minus, in the row of buttons above the ticket (Figure 1). The item comes off the ticket.
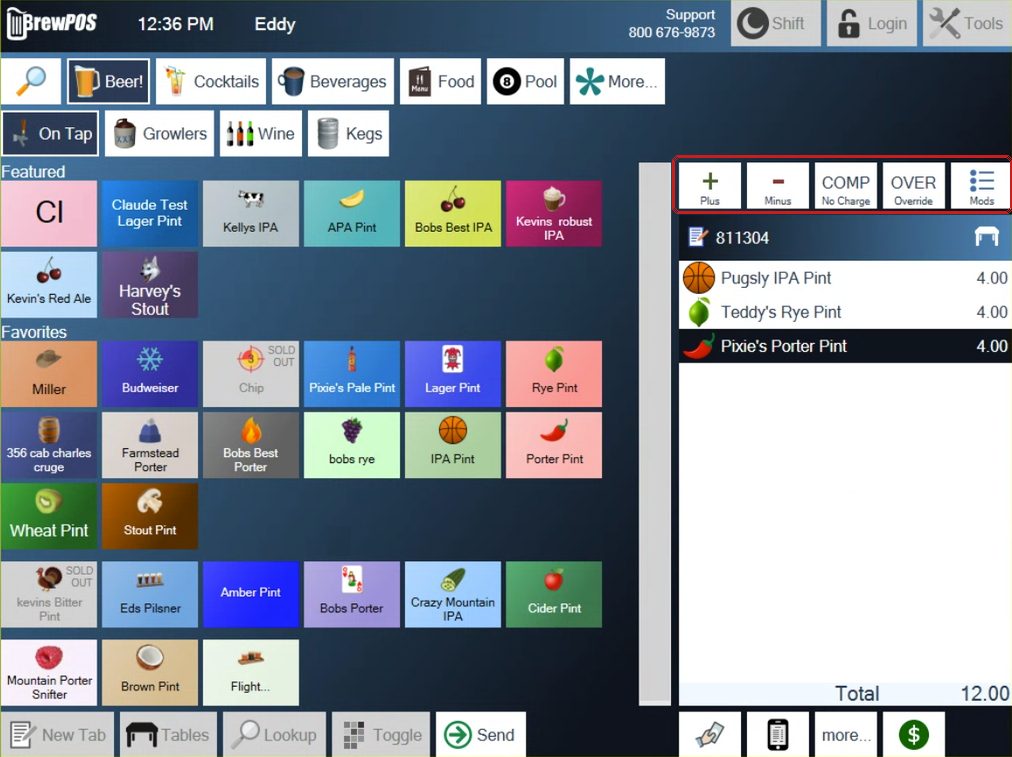
Figure 1. Plus, Minus, COMP, OVER and Mods, above the ticket (outlined in red)
Minus is meant for items that have not gone to the kitchen yet. An employee can be given permission in Admin to minus items after they are sent too. Each one is logged as a minus after send.
Comp an item
Comping sets the item's price to 0.
1. Select the item.
2. Tap COMP. The price changes to 0.00 and the item is marked COMP (Figure 2).
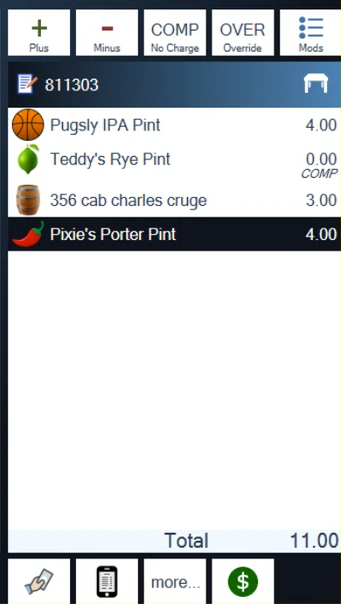
Figure 2. Teddy's Rye Pint, comped
Your system can be set to ask for a reason every time something is comped.
Comp the whole ticket
1. Tap more..., bottom right of the order screen.
2. Tap Comp Ticket, top right (Figure 5).
3. At Comp the whole Ticket?, tap the green check mark. Every item goes to 0.00, and the ticket shows a Comp Ticket line with the amount comped.
Override or discount an item
1. Select the item.
2. Tap OVER (override). The Price Override screen opens (Figure 3).
3. Either type the exact new price and tap the green check mark, or tap a percentage button along the bottom (5% up to 50%). A percentage applies straight away.
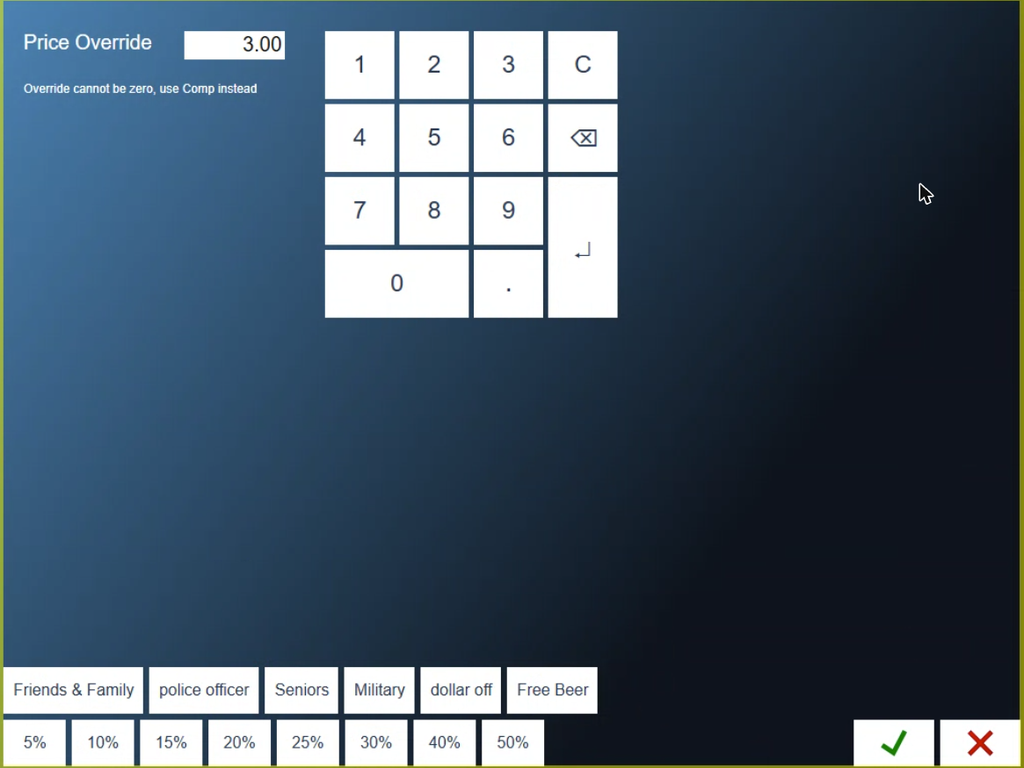
Figure 3. Price Override. Your own discount buttons sit above the percentages
An override cannot be zero: the screen says to use Comp instead. On the ticket the item shows its new price, marked OVERRIDE (Figure 4).
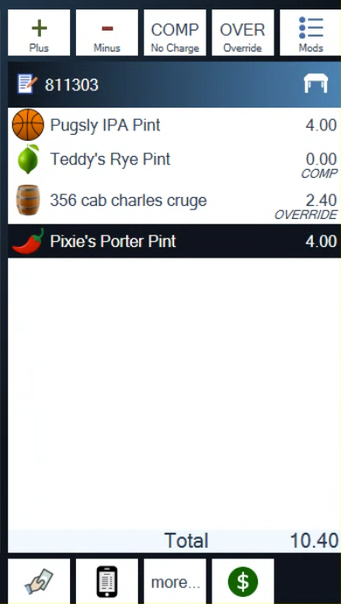
Figure 4. 356 cab charles cruge, overridden from 3.00 to 2.40
The buttons above the percentages, such as Friends & Family, Seniors and dollar off here, are your own discount buttons. They are made in Admin.
Discount the whole ticket
1. Tap more..., bottom right of the order screen (Figure 5).
2. Make sure Discount is highlighted at the top left. Gratuity, beside it, adds a gratuity instead.
3. Choose % or $.
4. Type the amount on the keypad, or tap a percentage along the bottom, or one of your discount buttons above them.
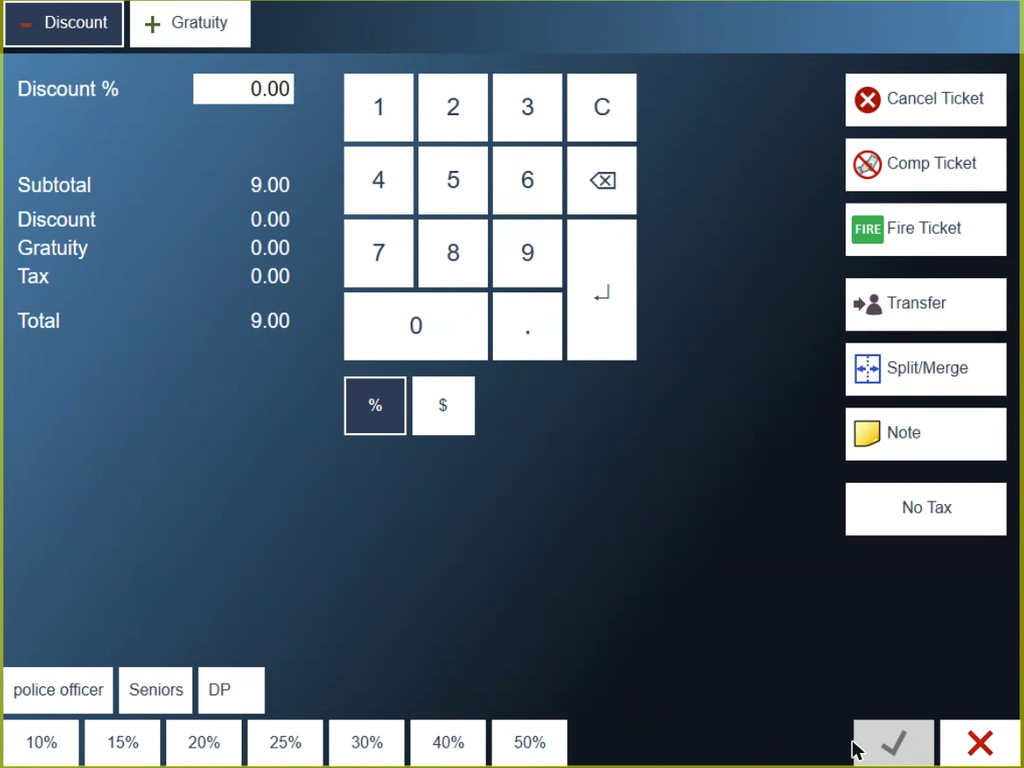
Figure 5. The more screen. Discount at the top left, the ticket buttons down the right
The discount shows at the foot of the ticket, above the total (Figure 6). Your system can be set to ask for a reason every time.
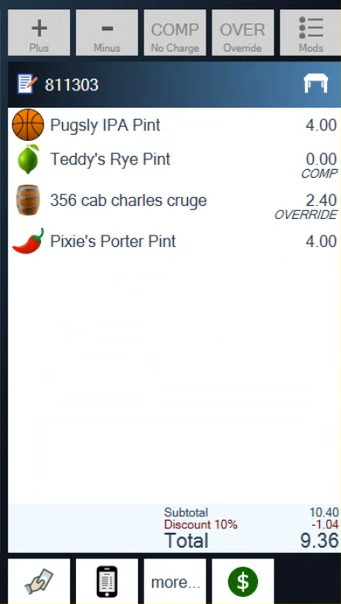
Figure 6. A ticket discount, shown above the total
The more screen also holds Hold Ticket (or Fire Ticket), Transfer, Split/Merge, Note and No Tax.
Cancel a ticket
1. Tap more..., bottom right of the order screen.
2. Tap Cancel Ticket, top right.
3. At Cancel this Ticket?, tap the green check mark. The ticket closes.
Cancel removes the ticket's items from the system. See the warning under Which one to use before cancelling anything that was made.
Void a paid ticket
Voids are for tickets that have already been paid.
1. Tap Tools, then History. Closed tickets are listed on the left (Figure 7).
2. Select the ticket.
3. Tap Void, at the bottom: a red X in a circle.
4. At Void this Sale?, tap the green check mark (Figure 8), then re-enter your PIN.
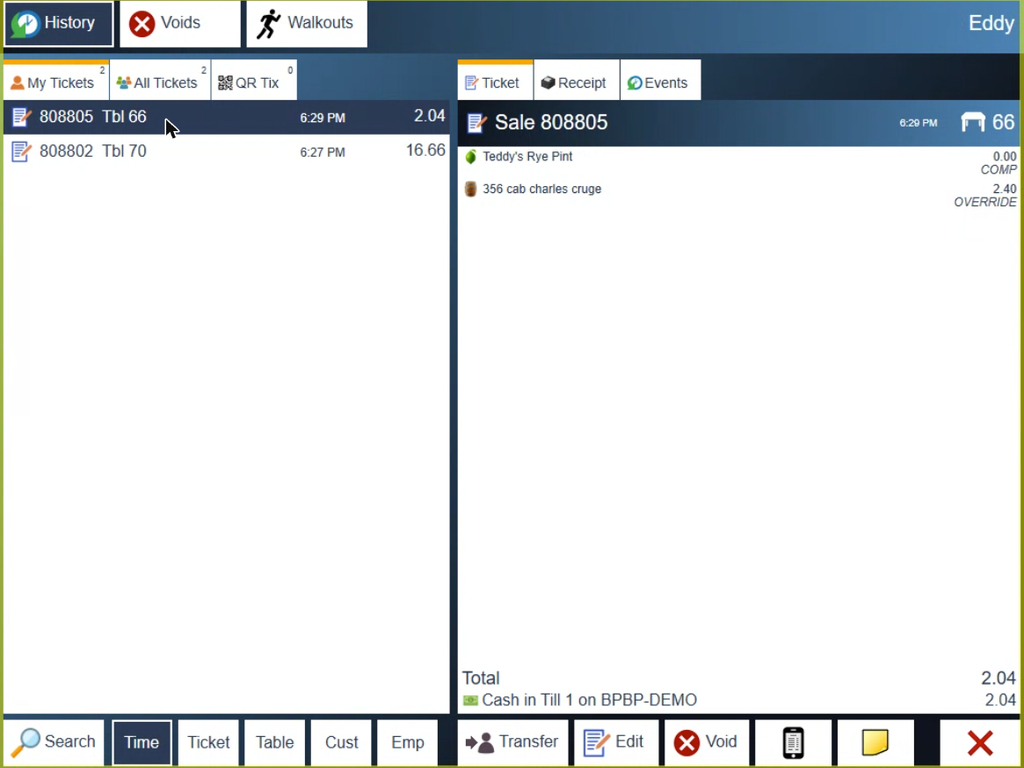
Figure 7. History. Void is at the bottom, under the selected ticket
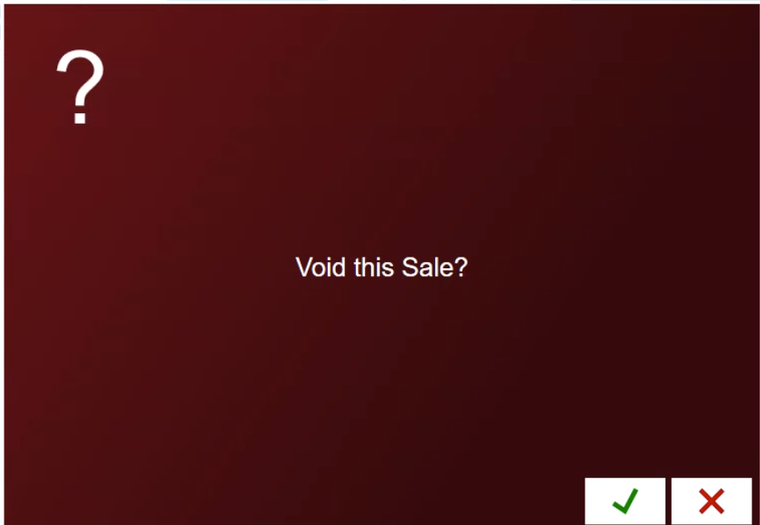
Figure 8. The POS asks before voiding
Voided tickets are listed on the Voids tab at the top of History.
Watch out: voiding voids the card payment too
Voiding a ticket paid by credit card also voids the payment, and the card number is not kept.
Who can do what, and where it is tracked
Each of these is a permission given employee by employee in BREW POS Admin. The steps are in Managing employees.
Comps, overrides, discounts, cancels and voids are each tracked in four places:
• the ticket's event log
• the Comp tab at closeout
• Reports, Activity
• Reports, Summary, Employee
About this guide
Applies to: the BREW POS terminal.
Last reviewed: 4 October 2026
BrewPOS How to use
Support 1-800-676-9874
Email [email protected]
© 2026 BREW POS. All rights reserved.