
Scanning barcodes to count or receive stock
Instead of typing in quantities, you can scan the products with a barcode scanner. Any USB or Bluetooth scanner works: plug it in and Windows sets it up. Scanning works for a count and for receiving stock.
Before you start
A product can only be scanned if it is tracked in stock and its barcode is on its record. See Tracking a product in stock.
Scan a count
1. Go to More, Inventory, Tasks, then the Count tab. For receiving, use the Receive tab instead.
2. Click New.
3. Choose the Location, select Scan barcodes, and click OK (Figure 1).
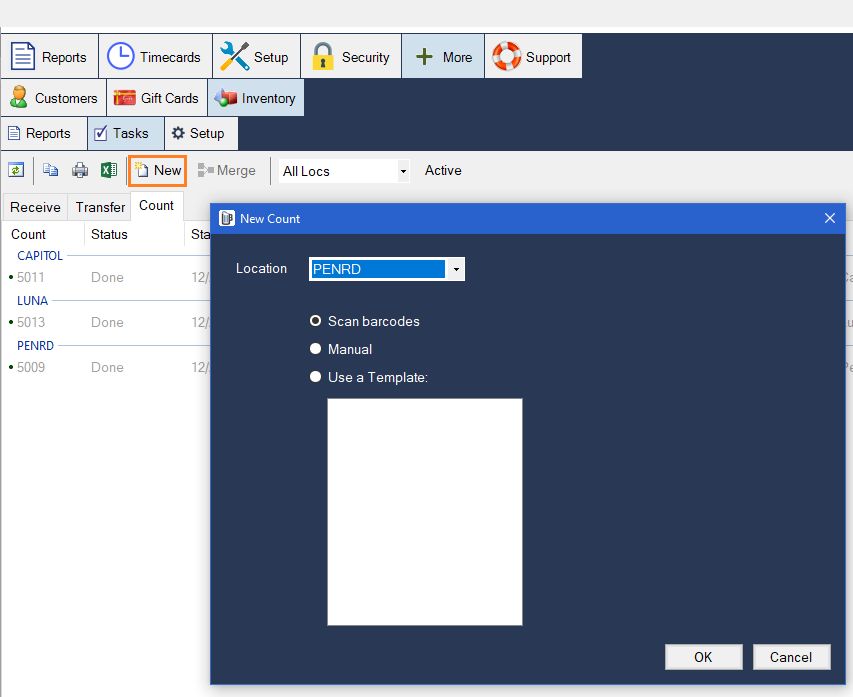
Figure 1. Choose Scan barcodes for a new count
4. Scan each product. Every scan beeps if the product was found, or buzzes if it was not found or is not tracked.
The top of the screen lists what you have scanned and how many (Figure 2). The bottom lists anything that was not found or is not tracked, so you can sort it out afterwards.
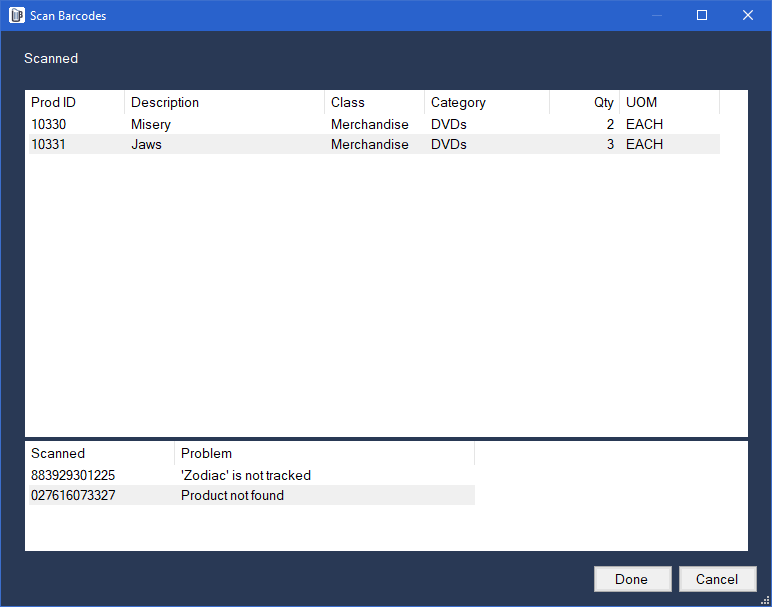
Figure 2. Two of one product and three of another scanned. Two barcodes had a problem
5. Click Done. A new batch is made with everything you scanned. Carry on with it as you would any count or receiving lot.
Merge counts from several people
Several people can scan at the same time, each in their own count, and you combine them afterwards.
1. Select one of the open counts at the location.
2. Click Merge (Figure 3). Every count at that location with a status of New is combined into one.
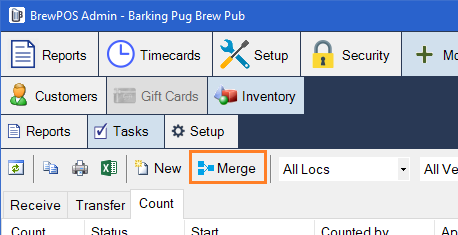
Figure 3. Merge, beside New
About this guide
BREW POS Admin: merchant how-to guide
Applies to: BREW POS Admin. Written from the BrewPOS quick reference Inventory: Scan Barcodes in Admin (May 2021). Not yet re-checked against the current release. The screens shown are from an older version of Admin and may look different on yours.
Last reviewed: 29 September 2026 · Owner: Eddy
BrewPOS How to use
Support 1-800-676-9874
Email [email protected]
© 2026 BREW POS. All rights reserved.