
Receiving stock
When a delivery arrives, you record it as a receiving lot. That adds the stock to your counts and records what you paid for it.
Before you start
• Your business needs the stock module.
• Every raw material you are receiving has to be set up in Admin.
• Products sold one at a time without a recipe, such as cans or bottles of beer, need stock tracking switched on. See Tracking a product in stock.
• The vendor has to be set up in Admin.
Start a receiving lot
1. Go to More, then Inventory (Figure 1).

Figure 1. More, then Inventory
2. Click the Receive tab, then New (Figure 2).
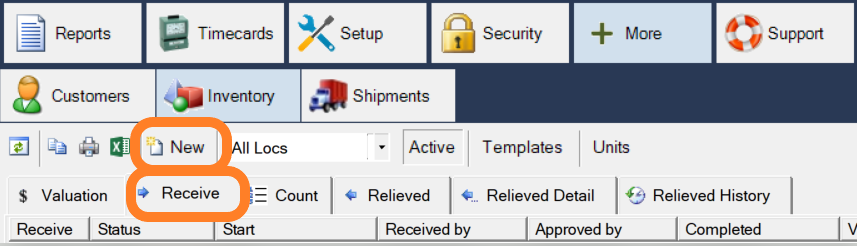
Figure 2. New on the Receive tab
3. Choose the Location. If you have templates, pick one, or choose a vendor. Click OK (Figure 3).
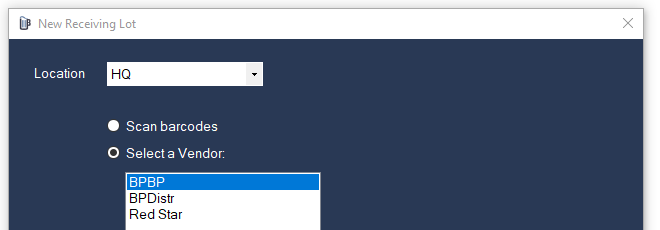
Figure 3. A new lot for HQ
4. Fill in the header (Figure 4):
• Vendor: who it came from.
• PO: a purchase order number, for your own reference.
• Notes: anything else, for your own reference.

Figure 4. The top of the lot
Add what arrived
1. Click + Products (Figure 5). A list of every stock-tracked product opens.

Figure 5. + Products, in the toolbar
2. Tick the products you received and close the list (Figure 6).
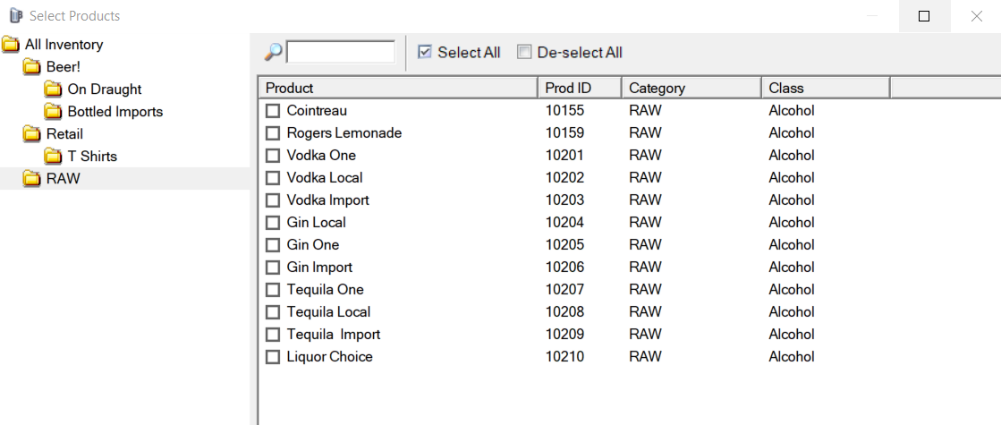
Figure 6. Pick the products that arrived
3. Click each product in turn and fill in the grid above (Figure 7):
• Qty: how many arrived.
• UOM: in what size, such as a fifth or a gallon.
• Unit Cost: what you paid for each one of that size.
• Cost and OZ work themselves out.
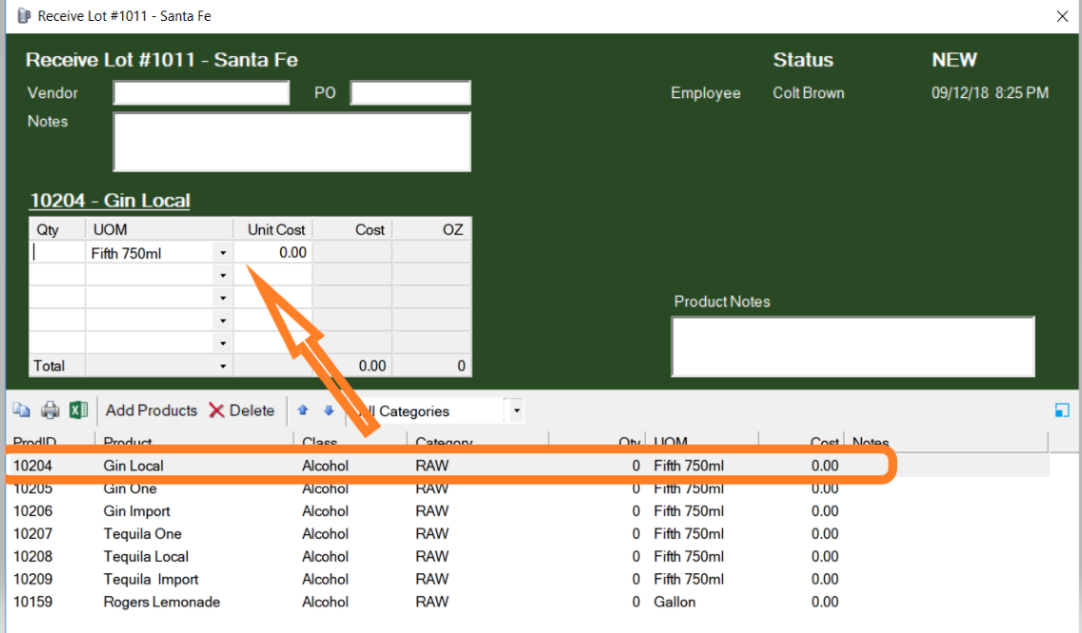
Figure 7. Gin Local selected, ready for its quantity and cost
4. If one product came in more than one size, put each size on its own line.
When everything is in, the system adds up the quantity in the product's stock unit and gives the total cost (Figure 8). The stock unit is set when the raw material is made.
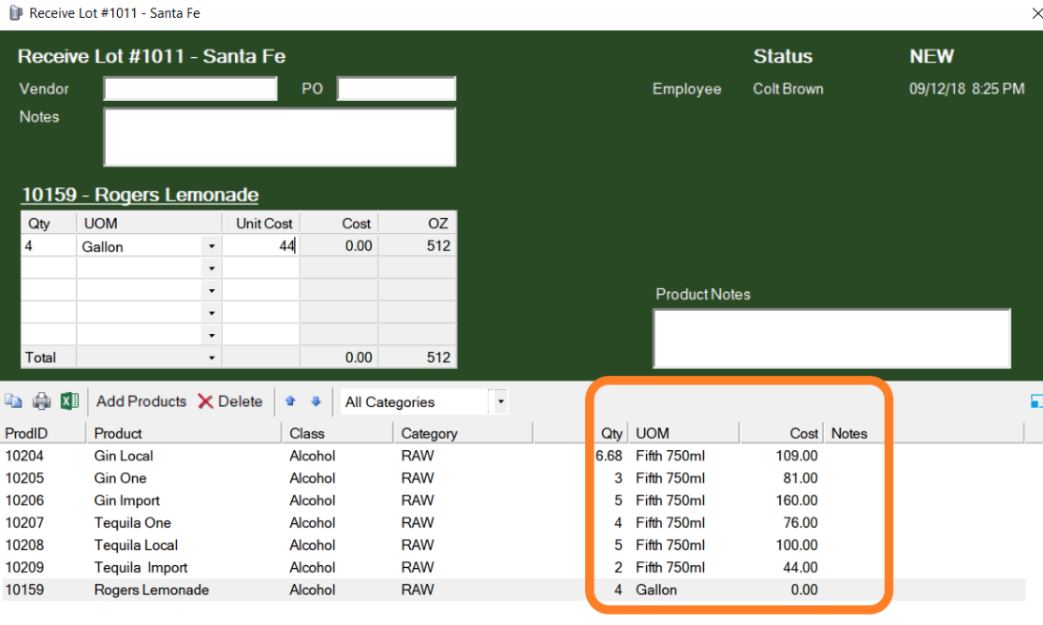
Figure 8. Every product filled in, with the totals on the right
Save or finish
The buttons along the bottom of the lot:
• Previous and Next move between the products you added.
• Save as Template saves this list of products, so a lot from the same vendor can start already filled in.
• Print prints the lot.
• Abandon throws the lot away, including anything saved.
• Save asks whether you are finished (Figure 9). No saves your work to finish later. Yes marks the lot finished, or sends it for approval.
• Cancel leaves without saving.
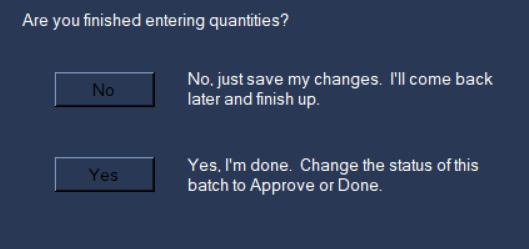
Figure 9. Yes finishes the lot. No saves it for later
Approve a lot
Your business can require a manager or owner to check each lot before it counts. If it does, finished lots show APPROVE in the Status column (Figure 10). You need approval permission on your employee record.
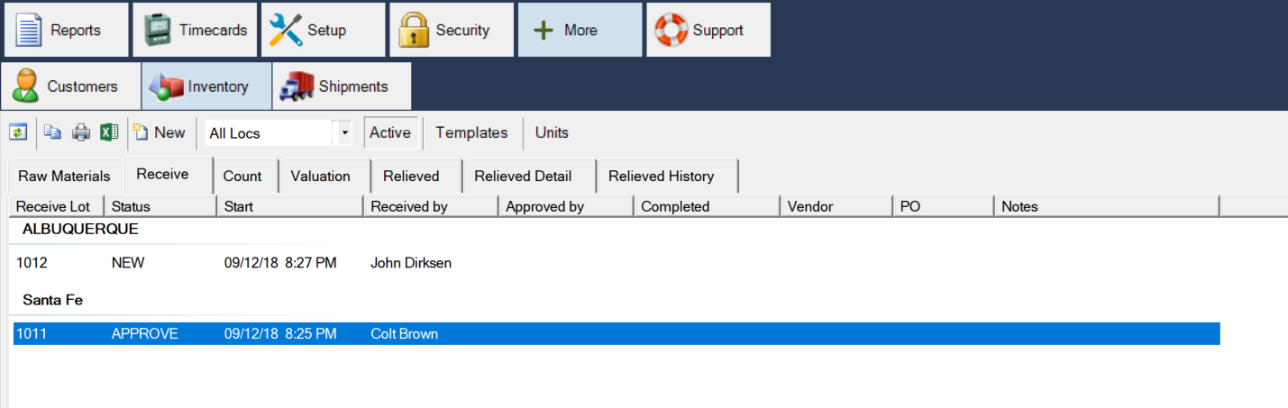
Figure 10. Lot 1011 is waiting for approval
1. Double-click the lot marked APPROVE. The review screen opens (Figure 11).
2. Click any product to change it.
3. Click Save, then either save your changes for later or approve the lot.
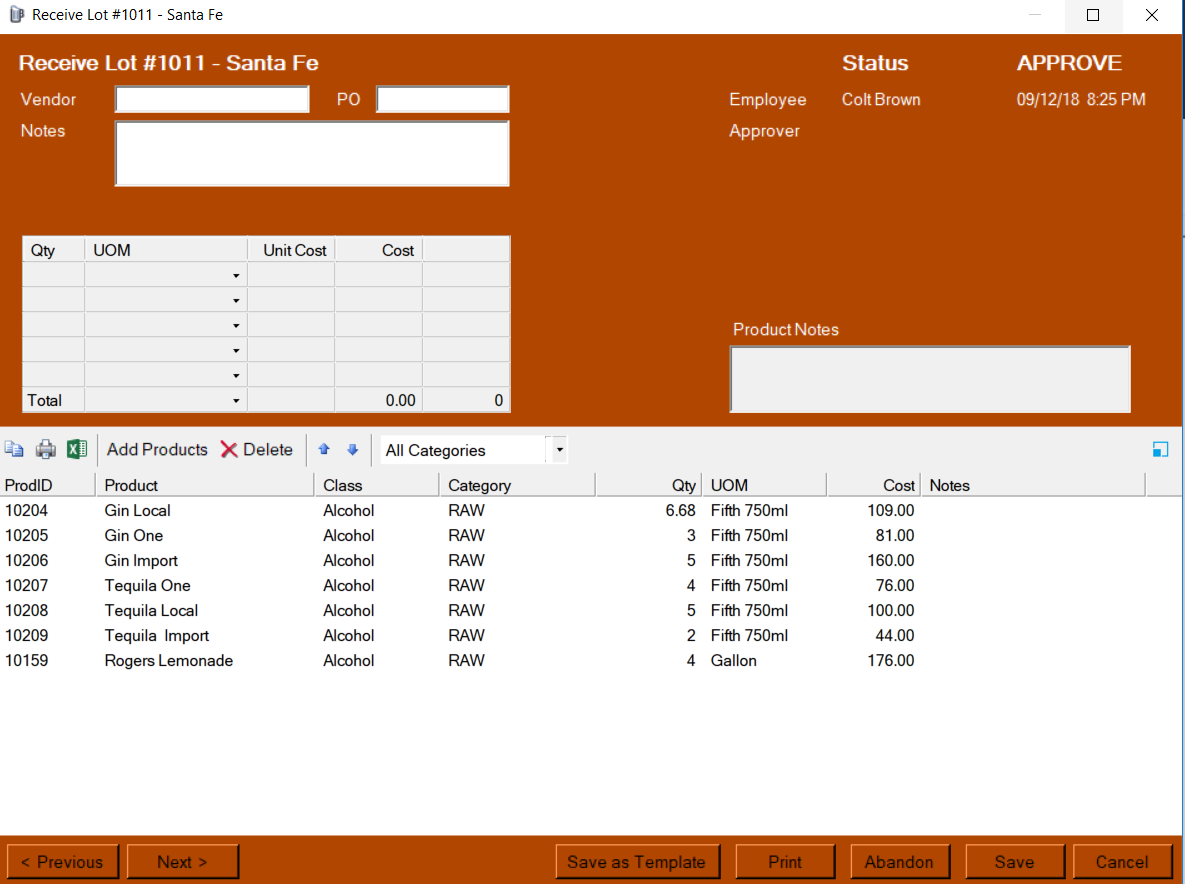
Figure 11. The review screen, where a lot is checked before it goes live
See lots you have finished
On the Receive tab, click Active to show finished lots as well (Figure 12). They are in light grey. Double-click one to see what was in it.
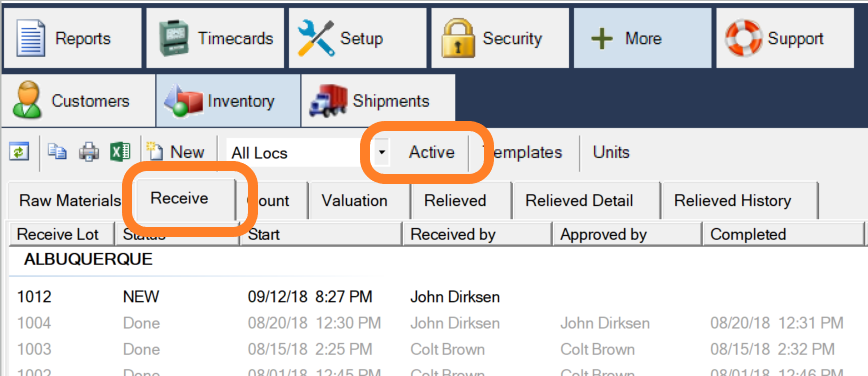
Figure 12. Active switched off, so finished lots show in grey
About this guide
BREW POS Admin: merchant how-to guide
Applies to: BREW POS Admin. Written from the BrewPOS quick reference Receiving Inventory (December 2020). Not yet re-checked against the current release. The screens shown are from an older version of Admin and may look different on yours.
Last reviewed: 29 September 2026 · Owner: Eddy
BrewPOS How to use
Support 1-800-676-9874
Email [email protected]
© 2026 BREW POS. All rights reserved.